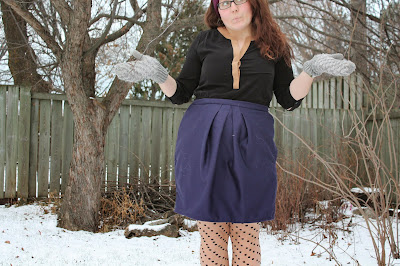
Showing posts with label pleats. Show all posts

08 May 2014

The tale of two Flora's


Day after day my Feedly was swamped with various versions of the new By Hand London girls Flora dress. The fabric patterns, the fit, the happiness it brought to everybody's face lured me. I couldn't resist and purchased my own copy (After much waffling only because those patterns are NOT cheap, especially to ship to Canada - yikes).

I received and within an hour had my size 14 traced out and ready for making. I grabbed a purple gabardine I had in my stash and got cracking. cut cut sew sew. Instructions were simple to follow. Lining went together perfectly. Inserted my first invisible zipper with my new invisible zipper foot for my machine (what a joy! I'm no longer scared of zippers!) from start the finish it took me under 5 hours. With the majority of time spent sewing the 12 total darts (too Many darts!!!).

I tried it on all excited. Wait, I'll back up. I measured the pattern and everything seemed fine in flat measurements and I don't toil so just got on with it. now, back to me trying it on all excited - zipped it up, ran to my full length mirror, slipping on hard wood underfoot, and stare at my new creation. But wait, why doesn't it look as nice sad everybody else's? This bodice is gaping. So is the back bodice around the neck. So are the under arms. What the!


So, turns out, this pattern isn't perfect for me. And my shoulders are too narrow for the standard pattern drafting. So the dress fits bad across the top. To solve this I ironed interfacing across the front neckline to stiffen the material and provide more support, but because of how wide the bodice is across my cheat, putting my arms down pushes the bodice inwards causing it to gape. sad. I should simply cut the bodice narrower, but that's so much work, and I still think this is wearable.....so I made a second flora!

let me break down my alterations I made to the pattern for my second flora!
- took a 1/2 inch wedge out of the bodice front and back in the middle of the neckline to reduce gaping issue
- cut out the arm hole and moved the entire piece 1 inch towards the centre (this narrows the front bodice while maintaining the bust and waist proportions)
- removed a 1/4 inch wedge from under the armpit to reduce gaping under the arms
- moved the front bust darts towards the centre front by 1/4 inch
- widened the front bust dart base by 1/8 inch tapering it the fit the original dart about half way up. (To reduce the fabric pooling just under my bust and at my waist) (alternatively I could have adjusted the bodice side shaping , but dart adjustments are easier for me)
- reduced the shoulder piece length by 1 inch

Phew. That sounds like a lot of alterations, and in fact my pattern pieces are looking really mangled (especially with the blue painters tape!) but hey - this flora turned out near perfect! And just LOOK at this print!! It SCREAMS spring! It's the first pattern that I made alterations to, on my second round, to produce a better fit. And you know what? It was totally worth my time!


and next time I'll stay stitch the bodice waist as it stretched and is a little loose. I might take in the sides another 1/4" each and sew the waist seam another 1/4" just across the stomach to reduce the slight drooping that's occurring. Little things.


Beautiful invisible zipper (Especially considering it is my FIRST invisible zipper with my zipper foot!). Front knife pleats and back pleats. So beautiful

This flora is my demand to the Canadian weather gods to give me spring!!


Pattern: By Hand London Flora dress - Variation 2: Tank
Size: 14
Fabric: purple gabardine & floral polyester
Alterations:

  • front dart placement and width
  • narrow shoulder adjustment
  • hollow upper chest adjustment
  • rounded upper back adjustment
  • gaping under arm adjustment
  • shortened shoulder strap
Read More »

03 February 2014

The Ailakki Cross Front Dress


I started sewing because I wanted so many pretty dresses. All the pretty dresses in the world. But that isn't practical. What would I do with hundred's of party dresses. The occasions for such dress rarely occur in my life. The infrequency of event makes the sewing time-commitment not worth it. 

When an event DOES come along? I got so excited at the idea of making a fancy dress I immediately scoured the interwebs for inspiration. Conveniently I happened to read Jolies Bobines Ailakki Jumpsuit post and ADORED BOTH her renditions. I knew I needed to have Ailakki in my life and the dress version was EXACTLY what I was looking for.

I adore the Ailakki jumpsuit. I adore most jumpsuits. Just not on me. They make me look 6 months pregnant. But that bodice is so stunning that I ignored the jumpsuit and immediately knew I could pair it with a skirt pattern I love. And Voila I would have a dress I adore.

Now, I've never worn a dress with a keyhole in them. I always thought they were beautiful, but always felt that when I sit down, fat would gush through the whole, and that isn't flattering now is it. I never want to feel uncomfortable, especially in my me-mades. I sew so I can wear styles that don't fit me in RTW but that I've always loved. And this keyhole pattern exactly fits the bill. A style I've never found that fits well in any RTW outfits, but that I desperately wanted to work on me. 

The fabric is a Rayon/Tweed. It's like I have a sense when Rayon is in my presence. I saw this fabric; loved it. Touched it; loved it more. Checked the fabric content; knew it was the one for me. I'm just naturally drawn to Rayon fabrics apparently. The lining is a Rayon Bemberg in plain black. 

I finished the bodice in 2 hours to finish the bodice and attach the waist band. I spent a lot of time adjusting how the waistband would sit. When I initially tried the bodice on, I could tell the pattern is made for a significantly smaller bust than mine, and I'm not well endowed. At the top of both breasts the pattern flared out very obnoxiously showcasing my bra proudly. This is not a flatting look. To correct this obvious fit problem I decided to add a second dart to each side of the bodice pointing down towards the apex. There is about 1 inch between the points the two darts on each bodice piece. The hardest part about these additional darts was it made the boobs very pointy. 


The skirt is a pattern from La Mia Boutique's May 2013 issue. It was actually one of my first dresses I made here. It had the pockets that I wanted and I just added an extra inch to the centre front and back so I could enlarge the 4 inverted pleats. 


The only other adjustment I needed to made was to take the shoulders in by 1 inch after realizing I preferred the fit of the bodice with the shoulders up higher. This did cause the keyhole to be huge naturally, so to fit the patterns natural urge to gap open and showcase the ladies, I top stitched the bodice in place to prevent any potential wardrobe malfunctions at my event. 

I used a 9" black oxidized metal zipper for the back with a large pull tab. I like metal zippers. I screwed up my insertion slightly when trying to serge the raw edges along the zipper and accidentally sent the top stop under my serger needles. That snapped my needle rather fast. So The top of the zipper is very close and the pull tab doesn't QUITE make it to the very top teeth. And the dress didn't look good with hook and eye so I'll just deal with the zipper always being slightly undone. I danced the entire night away and the zipper didn't budge once. So I think it's acceptable in my eyes!
I danced the night away and learned some ballroom dance moves from my date for the night! Every girl loves a great dance.

Details

Pattern: Named Clothing Ailakki Cross Front Jumpsuit
Size: 44
Fabric: Rayon/Tweed
Cost: $7/metre and 1.5 metres used.
Alterations:

  • Pleated skirt instead of pants
  • Top stitched bodice in place
  • Added darts to the upper bust to create contouring around chest
  • Shortened bodice at shoulder seams
Read More »

02 December 2013

Wool & Blue & Something New


The first piece of clothing I made was this free Bubble skirt pattern from Burda Style. I was enrolled in an introductory sewing class in Toronto and I needed to have a pattern and fabric already selected.

In all honesty I didn't really know what I was doing. I just thought it would all work out. And happily it did.

I was so utterly excited to go to the fabric store for the first time with a plan. I knew I wanted a nice soft wool for my skirt. And I also wanted it cheaply because well, who doesn't love a bargain? Not an easy thing to find. But I was determined. I searched every bolt of wool in Designer Fabrics on Queen St in Toronto first by feel and then by price. Every. single. bolt. I was in there for a good 3 hours looking at wool. It was love.

I eventually found this blue wool suiting that has an incredible soft touch with a slight sheen. And at only $5/metre I knew I'd found the one. That feeling never goes away. I LOVE finding incredible fabrics. Oh the possibilities.

This may have been one of the only times that I had a pattern and went in search of a fabric for it. Typically I buy fabrics that I love and then figure out what to make of them. It typically works out. But I also have a large fabric stash now. Choices - FUN.


The bubble on this skirt was HUGE. Like, make me look like a hippopotamus huge. So after making the entire skirt, I had to grade down the hips, thus eliminating plenty of the girth of this bubble, to an appropriate level. I must of taken off 3 inches on each side. Re-donkulous.

Now, this skirt isn't perfect. I admit that. I added an exposed metal zipper to the left side, but it is too heavy for the drape and shape of the pattern and weighs that side down. I definitely couldn't sew a straight line at this time (I admit I'm STILL not the best at straight lines. Sometimes they weave - my bad) I used a purplish thread which shows very obviously on the hemline. And finally my pleats are uneven and my waistband is wavy. BUT, it was my first piece of clothing ever.

The fact that I will still wear it in public means that even with all its flaws and imperfections - it is still wearable to me. And that is all that matters. Plus, I get compliments on it when I do wear it so they imperfections are more noticeable to me than to others. Even better.
Me! Me! Take my Picture! Me! Take MY Picture!   -Scotia
First skirt. Forever love.
Read More »

30 September 2013

Lime Dress - La Mia Boutique May 2013


After reading the review of La Mia Boutique's May 2013 magazine on Paunnet's website I knew I had to own it. My lack of fluency in Italian would not be an obstacle to the having of this magazine! (And between my knowledge of both French and Spanish and the sewing princess' helpful magazine terminology translations I figured I could manage)

I purchased a copy of the LMB May 2013 Grace Kelly inspired issue from aroundtheworldnyc.com. They sell back orders of many fashion magazines. If you're lucky enough to live in NYC they have a store, Otherwise everything is available for order. 

Receiving pattern magazines in the mail is one of the most exciting experiences. It's like Christmas all year round. I'll just have to watch my bank account isn't depleted from this discovery!


Anyways back to my new dress! Eee! I love it! I choose this dress because of the pockets. I love me a dress with pockets and this dress had pockets I've never tried before. I've only seen in-seam pockets. These are diagonal cut pockets.  I took my time and understitched the pockets to keep the hem rolling inwards as well as to add more strength to them. Pockets get a serious workout when I wear them so I want to reduce the risk of a hole!


The spongey quality to the fabric makes it feel similar to neoprene. And this has both benefits and drawbacks. A benefit of it is the lovely stretch and recovery. It required no exceptional fitting in the bodice as the fabric stretches nicely across the ladies. Another benefit is not needing to finish my edges as the fabric cuts smooth and doesn't fray! Yay! 


The only drawback I have with this fabric is the bulk it has at the waistline. Mostly crossing the pockets. I had 4 layers the sew through and I worried my needle would skip. Luckily my Grandmothers Singer sewing machine has heft and she powered right through those 4 layers laying at their spongey attempt to block her way!

Also, I sewed everything with a straight stitch. I don't like the look of zigzag so I avoid it whenever I can. I'm just extra careful when pulling my dress over my head so I don't snap my stitching. 

Pattern: La Mia Boutique Dress 3 May 2013
Fabric: neon green polyester - sponge like texture with plenty of stretch
Size: cut the 46 bit ended up grading down to a 44 for the top
Alterations
-omitted the zipper and reduced the centre back piece. Cut piece on the fold to eliminate centre back seam. 
-added extra pleats in the front and back for more fullness in the skirt
- omitted the sleeve band
-sewed waist seam at 1 inch 
- chopped 5 inches off the skirt bottom
Read More »