Showing posts with label Dress. Show all posts

06 October 2014

Bruyere Ships as a Dress!


And then there were two.

This pattern was a dream. After finishing my first Bruyere out of Robert Kaufman Chambray and wearing it, I knew there needed to be a second. During the same purchase as the dots I purchased this Ships chambray fabric. It is a great fabric, it's light and crisp, but it doesn't feel AS buttery as the dots chambray. But it has Ships so they are kind of equal.


The one significant difference for this Bruyere is......I made it a dress! I've never had a shirt dress. This goes back to me never fitting button up shirts. But now that I can make my own - YAY! I simply lengthened the bottom pieces by 4 inches each. Shows you how short I am eh?


This time I also sewed the side seams up at 7/8" instead of the given 5/8". Because of the length, I wanted to make sure the waist was snug to give me some definition. My other Bruyere fits very comfortably around the waist but it is loose. This one sits perfectly snug to my skin with almost no ease. The one thing I do notice with reducing the shirt to minimal ease is that I could use 1/4" length added to the top bodice pieces - it pulls up slightly if I raise my arms.

I also shaved off 5/8" from each bodice sleeve so the sleeves sit directly on my shoulders instead of hanging slightly off.


I bought these cute silver anchor buttons, but I realized I'd have to hand sew them and that just wasn't going to happen on a shirt with so many buttons. I didn't want it to look sloppy and my hand sewing certainly looks sloppy. I replaced them with these cute blue buttons with a unique swirl pattern on them. Each button is different.


I made the shirt exactly the same and yet on this dress perversion, one side of my button placket is 1 inch longer than the other. I very much wish it worked out evenly on the bottom, but this imperfection enables me to prove that this is handmade - and people believe me now!


I tried to place the ships perfectly on the collar to help showcase them. But they didn't end up centred. I also centred ships on the upper biceps of the arms. Otherwise the ships are haphazard and when I look at it, I feel like most ships are upside-down.


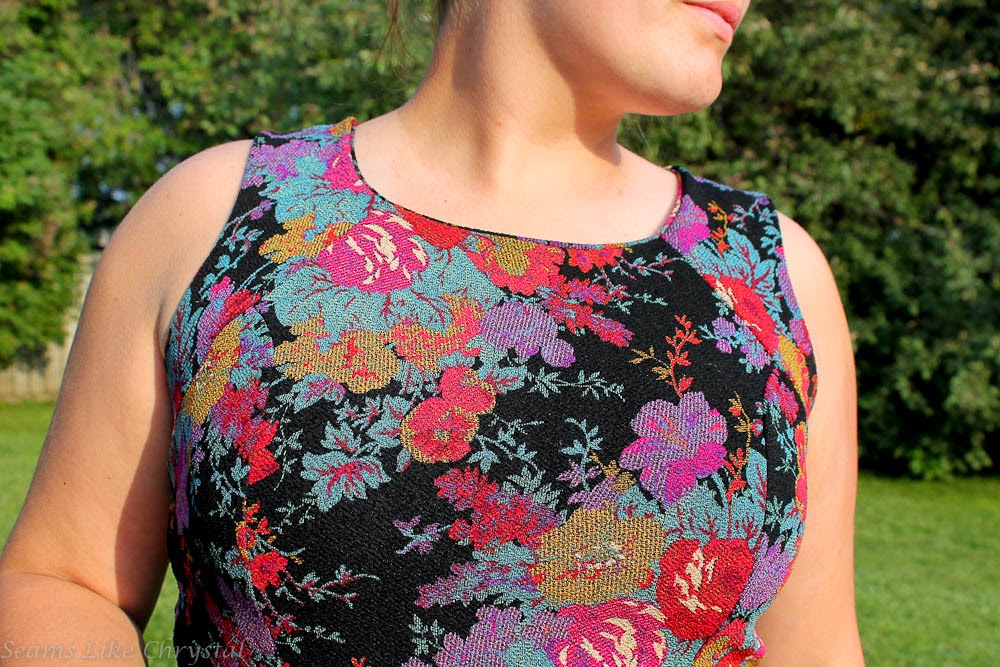
Had you not noticed, the colours are fairly saturated in my photos. I have a bad habit of taking photos immediately after work; the sun is up and shining brightly, so you often cannot see anything on my handmades without much alteration. So excuse that.


Love my new Ships Bruyere shirt dress! Me and Bruyere sitting in a tree k-i-s-s-i-n-g......

Details

Pattern: Bruyere shirt by Deer and Doe
Size: 14
Fabric: Robert Kaufman Nautique Chambray SRK-14276-62 Indigo 
Alterations:


  • Lengthened the bottom pieces by 4" to turn Bruyere in to a dress
  • Sewed side seams at 7/8" for reduced ease
  • Reduced top of arm scythe by 5/8" to have sleeves sit on my shoulders better 
Read More »

25 August 2014

Purple Chiffon V1102

I love this PATTERN! I have officially found the pattern that I feel is me. Everything about it makes me so utterly happy: the open back, the back ties, the high neck, boat neck, empire waist, flowy skirt. I made this dress for a wedding I was attending and it is my first time sewing with a chiffon fabric. Maybe sewing on a deadline isn't a great time to pick a new-to-me fabric that is notoriously slippy and difficult to sew with? Maybe? Nahhhh....


The chiffon is 100% polyester. I didn't splurge on it. But I adored the pattern and bought it as soon as it went on sale. Since the fabric was sheer and the pattern has a full lining, I didn't want the seams to show through to the front so I decided to underline all the chiffon with a white cotton I had in my stash as well as fully line it with a light grey rayon lining.

Look at that bow - LOOK AT IT!!! I'm in love! So much in love. I left the bow unlined as I felt it would be nicer with just the chiffon.

And since the fabric had more droop to it than my last version in 100% cotton I added elastic to the waist seam to keep things more accentuated. Basically I wanted a little added boost for the ladies and to give myself some definition around the middle instead of blob shaped.


I decided to use a simple gathered skirt once again over a circle skirt but cut a high-low hem line because they are my favourite. I cut the lining to mid-thigh length to showcase the chiffon on top and its see-through qualities. Gotta show a little leg amiright ladies? In a classy way of course! (ps - look at that skirt...it has some serious flow!)


To showcase how well the bodice fits across my chest and a little of the arm scythe. So much more comfortable to wear a well fitted garment.


The fabric has a slight crepe texture to it but look at those beautiful colours! All seams are completed on the serger and this fabric is cheap cheap cheap so it frayed something fierce. Ugh. It won't last too long which is sad but it fulfilled its purpose of dancing its heart out at my friends wedding (She made her own wedding dress - it was stunning!)

Details


Pattern: Vogue 1102
Size: 14
Fabric: Polyester Chiffon
Alterations:
  • Twisted a Wedge from the arm scythe into the waist darts
  • Gathered skirt with hi-low hem
  • Removed an inch from the centre back bodice for better lower back coverage
  • Added elastic to the waist seam
  • Omitted the facings and only used a full lining
  • Invisible zipper and no hook and eye (too lazy to put one in)


Read More »

22 August 2014

White&Grey Easy Summer M6955


Summer lovin - happens so fast! Too bad I'm too lazy to bust out the GOOD camera. So you're welcome to peruse these lovely iphone photos. Great quality eh? Good ol self timer app!


Fabricland had a sale on all of the cotton sateen fabrics and at $4/metre I couldn't go wrong. Lovely prints too! I bought 4 different cotton sateen's and immediately started scheming what I wanted to make. During a recent $1.99 sale on the McCall's website I ordered 10 or so patterns, one of which was M6955: a Laura Ashley Easy project. 
I adored the racer back of the dress and figured the cotton sateen would be perfect for the silhouette of the dress. The fabric would also help the dress to feel snug against my body but still provide me with lots of breathing room with the stretch content. Yay!


I made a fair few adjustments to the pattern. I cut out a size 10 because I wanted to accommodate for the stretch of the fabric and opted to finish my dress with binding instead of bias tape to reduce bulk and make my life 100% easier. This type of finish is the quickest for me while using my serger. the more projects I can complete using only my serger the better! I busted out this dress in >3 hours total from cutting to wearing. 

Back to those alterations I was talking about. After completing my Flora bodice, Belladone Bodice, and V1102 Bodice I began to notice how the flat pattern bodice needed to look for it to fit my body shape better. As soon as I cut out this flat pattern, it looked nothing like I knew it should to fit me. It would fit terribly straight from the envelope. So I starting slicing into the neckline and taking out wedges as I knew the neckline would gape - I then evened out the curve of the neckline. I did this to both the front and back necklines. I also took wedges out from the shoulder strap and turned the straps inwards to fit my narrow shoulders better (bodice shoulders always fall off my shoulders - they never will again!). Next I twisted out a dart from the arm scythe in to the waist darts. By the end my tissue pattern pieces were covered in tape missing all sorts of chunks and pieces. And finally, no dress is complete without the addition of in-seam pockets! I really should have used a lining fabric for those instead of the cotton sateen as they are quite bulky and make the circle skirt stick out across my hips.


The only changes I'll make for my next version of this would be to lengthen the bodice by 1/2" so the waist seam sits a little more comfortable when I move and lengthen the skirt by 1" and opt for 3/4 or 1/2 circle skirt instead of the full circle (which really likes to catch that breeze). Other than that, I put an invisible (or not so invisible) zipper in the centre back, finished my binding edges at the back neck above the zipper (and refused to put a hook and eye out of sheer laziness), and turned and stitched my hemline. The entire dress (besides the darts and zipper insertion) is finished on my serger - Yay for quick dresses! And YAY for easy summer cotton dresses!


Details

Pattern: M6955
Size: 10
Fabric: Cotton Sateen
Adjustments:
  • Removed a wedge out of the front neckline to reduce gaping
  • Removed 1" from the shoulder length
  • Took out a dart from the arm scythe and turned it into the bust darts
  • Removed a wedge out of the back neckline to reduce gaping
  • Finished the edges with binding instead of a facing to reduce thickness.
  • Added in-seam pockets to the circle skirt.
Read More »

04 August 2014

Painted Ponte - Manequim Oct 2013 #393

Sometimes you see a pattern and you just have to make it. This pattern from the October 2013 Manequim magazine pattern was one of them. The pieced bodice was interesting, and I adored their sample dress with the leather piping along the seams. I wish I could replicate that dress exactly.

When I decided to make the dress I knew I would have to make some changes. One major change was using a Ponte knit fabric instead of a woven. The pattern came in size 38 only, I topically make a size 42, and sans drafting skills I didn't know how to grade the pattern so took the easy route and make it up in a stretchy fabric. 

The only thing I forgot when switching to a knit was that could have cut the back pieces on the fold. But with the front bodice piecing, extra seam lines don't detract from the design of the dress. 

The second change I decided on was opting for an A-line skirt instead of the figure hugging option in the magazine. I knew if I made that exact dress I would never wear it as everybody would ask me when my due date was (....I'm not pregnant). I like to avoid setting myself up for those types of scenarios folks! I used the skirt from the Belladone dress which is my new favourite!

The bodice has a one piece facing which I lengthened to below my bust line as there is little I hate more than seeing the line of facing showing through across the top of my bust. simple modification and adds extra "hold" for the ladies. I like the snug feel when wearing Ponte knits but also the comfort that the Ponte isn't showing every lump and bump. That ain't pretty folks!  


I actually sewed this bodice up around Christmas time. Christmas in canada is freezing, so go figure I'd try sewing a sleeveless bodiced dress right? I make great decisions. But once I'd pieced the bodice together I put it in my unfinished project basket and it got lost in the vortex. I only refound it while moving my sewing space all downstairs. I fell instantly back in love with the painted Ponte fabric and the pieces bodice and decided to finish it. 1 hour later it was done. 

Isn't it funny how you gain and lose motivation? This bodice sat alone for 6 months unloved and one whimsical day I pick it up and finish it all in an hour?? Funny how things work. But it's all good because now that we're finally seeing some summer here It's all suns out guns out!


And finally let's talk about this stunning fabric shall we? I found it at fabricland, it most certainly is a polyester Ponte Roma fabric, but it has the most lovely painted flowers on it. Not just appear to be painted on, actually painted on. If you pick really really hard the paint can come off! it's such a cool fabric! I'm glad I buy fabric in 3m chunks as I now have some extra I might use for shoulders or sleeves of tshirt a. It's so lovely I want to use every scrap! I find of wish is purchased more as it's comfortable to wear. 


Read More »

27 July 2014

Flocked Flower Belladone


Finally, after a long time, I am a part of the Belladone lovers club! And I'm infatuated. This dress is just adorable. I always loved the pattern, especially that green fabric the sample dress is made of. And OH I love this dress!


The fabric is a grey cotton with black flocked flowers. It has the slightest amount of stretch, just enough to make a tighter dress still breathable. I found the fabric at the value village in town and I'm fairly certain it is supposed to be curtain or pillow fabric. It's a very nice fabric that I found absolutely perfect for dress-making.


Fitting wise I took the advice of many many many other bloggers that I follow online and adjusted the back pieces to reduce gaping. I took out 1/2" out of the neckline pieces as well as another 1/2" out of the front bodice. About 2 inches up the V from the centre of the lower piece of the back bodice I removed a 1/2" to accommodate my rounded back. And finally, one last adjustment, I took a 1/4" dart out of the front arm scythe and twisted it into the bust dart.


After attaching the waist band, I realized the bodice was a little short so I sewed it on at 3/8" instead of 5/8" to add some length to the bodice so the skirt would sit more naturally. And let's talk about this skirt. I LOVE this skirt. It is by far my favourite skirt pattern I've used. The slash pockets are beautiful and the front pleats sit beautifully. The only skirt adjustment I made was turning the back skirt darts in to pleats for added bum space.

I decided to use black bias tape to finish the dress as I like the way it accentuates the back cut out and the beautiful lines of the pockets. My bias binding it's perfect and you can see the ripples in some spots - I don't mind that, it isn't horrendous. I opted against black piping at the waist seam as I felt it would make me look wider. Also, since I could slip into the dress, I sewed the centre back together at the bias tape and started the invisible zipper just below. I like the clean finish this adds to the back instead of a hook and eye.


All and all this one of my favourites. It fits nice and snug and all the cute details make me so happy. I feel adorable when I wear this dress in public and isn't that what we all want when wearing our me-mades? This one is a success - There will be many more Belladone dresses in my future.

Details

Pattern: Deer & Doe Belladone
Size: 12
Fabric: Cotton?
Alteration: 
  • 1/4" dart from arm scythe twisted into the bust dart
  • 1/2" removed from front bodice neckline to reduce gaping
  • 1/2" wedge removed from upper back piece
  • 1/2" wedge removed from lower back piece near centre back.

Read More »

02 April 2014

Drape Drape no.5 V-neck Drape Dress

oh Drape Drape. You are so quickly becoming my favourite patterns. you're made of knits, your shapes are unique, and flatter the figure. Simply magnificent!


This is dress no.5 from Drape Drape. With extreme V-neck in both the front and back, gathered bodice, draping at the hips and a dipped hem at centre back. Such a beautiful design. 


This dress in no way is bra-friendly. Nor is it modest. So to retain some sense of mystery, I wore a tank top underneath (I'm thinking a bandeau would be beautiful too - for next time)

Another thing to note is that I cut the XL size which again is for a 90cm bust. 14cm less than my bust size. I think it fits fine. I don't feel it pulls across the chest to the sides but the back is more exposed than in the models photo. But, it still fits me so realize the sizes are very forgiving in a knit fabric.

When I started to make this dress, I feared that those hip drapes might look horrendous on my already prominent hips. But I'm extremely pleased with the outcome, as the drapes don't make them look larger so much as showcase their shapely appearance. Which I like! 

But that draped skirt didn't come easily. This fabric is a lightweight rayon knit. Beautifully soft to the touch but freely clings to tights and leggings. I spent a long time arranging the pleats and basting them in place as I knew that anything out of place would ruin the drape and effect of the dress. Manouvering a rayon knit into pleats while trying not to stretch the fabric is no easy feat; especially when the cut edges have a tendency to curl. I had these skirt panels in needle shackles by the end; one needle every 1mm apart - ridiculous right? but oh the end result is SO worth it!


But, like the idiot I am, I forgot to add a seam stabilizer to the shoulder seams. And not having shortened the shoulder length, the straps do appear to be growing with wear. Sad. I don't want to take it apart as it's fully lined with all seams enclosed, but I may have to if they don't shrink back in the wash. 


And, as I noticed the fabric didn't have a lot of elastic to help with stretch recovery; I added fold-over elastic to the inside waist seam to help keep the waist-shaping, carry the weight of the skirt, and reduce the stress on the shoulder seams. I may have made the elastic too tight as it is making my back bulge over a little, but what I can't see I shouldn't care about right? Right!

All and all this is a wonderfully easy dress to wear with some great features! I wore it many times to the beach and around the city!


Details

Pattern: Drape Drape no.5 V-Neck Drape Dress
Size: XL
Fabric: Rayon Knit
Required: 2.10 metres
Price: $14
Alterations:

  • Omitted the back zipper
  • Added fold-over elastic to the waist seam

These photos were all taken while wandering El Matador Beach in Malibu on a beautifully sunny day!
Read More »

27 January 2014

White Sweater Lola - Victory Patterns


Some of the first patterns I purchased were from Victory Patterns. I loved the easy style of the patterns but with the incredible opportunity to be made out of sweater material. I LOVE sweater material and being warm. And in Canada that is ALWAYS required. I purchased Lola, Chloe, and Hazel. 

I tried to make the Hazel. It was one of my first patterns, It turned out TERRIBLY and is about 3 sizes too big. This was before I realized that I should read the finished garment measurements too. Ooops. But after this mishap I put down Victory Patterns because they had discouraged me. 

Cold and Grey is all I've seen all week. It is FREEZING outside and my mood has turned similar. I wanted something that would make me happy and warm. This fabric is a cream sweater fabric that I purchased in July in Toronto. Sweater material in July is a great bargain as it was on sale, BUT, it is fairly useless with the summer heat. So it sat in remained in my fabric storage box taking up half the box. Sweater fabric is BULKY. More so when it comes in a tube. No start and no end.

I cut a size 12 for the top and a 16 for the hips. It turned out more A-line than I wanted originally but is difficult to adjust because of the pockets and omitting the hem band didn't help. It sewed up very quickly on my serger. It was my first time sewing a raglan sleeved item. I was very worried it wouldn't fit and I couldn't test it prior to sewing the top completely. It fit perfectly the first time which I appreciate since nobody likes to bust out the seam ripper for serged edges. I love the raglan sleeve now. I'm browsing all of my pattern magazines looking for more raglan sleeves!

The very obvious alteration I made was to add a large collar instead of a simple neck band. I didn't like where the neck band would sit on me, the basic circle neck isn't really for me. Combining my love of warmth and turtle necks, I added the thick collar. I simply cut a piece of fabric the same length as the collar (next time I'll cut it 1/2 inch smaller than the neck length) and cut the height 12 inches. I followed the same collar instructions as from the Renfrew but using one piece of fabric instead of two.

I love the collar. It is my favourite part of this whole dress now. I can wear it either up to keep me warm or fold it down so I can eat! Very important. Although the cream colour doesn't bode well for stain-free longevity. 

Now, the pockest. GOSH I love these pockets. Although they are gigantic and definitely add width to my hips, I don't even care - they are SO wonderful.

The bottom hem was serged then folded and stitched. I think this added to the slight wavy appearance of the hem. It is more prominent after wear, but when I steam it it appears straighter. Also, I have decided that I will always cut my hemlines with a slight 1 inch high-low to help compensate for my rear end. It makes this dress appear like the hemline is actually straight. But the extra inch in the back really does make me feel more comfortable and that the back of my dress is not SHORTER, which I often feel like it is.
Look at how fast I am mommy!

Details

Size: 12 for top 16 for bottom
Fabric: Cotton sweater
Cost: $6/metre and 2 metres used
Alterations:
  • Added a collar
  • Omitted sleeve and hem bands - Turn and Stitched instead
  • Shortened the pattern by 3 inches in the front and 2 inches in the back. Slight High/Low to compensate for my rear end which looks like an even hem from the side.

Read More »